While individuals in our community are doing their part to slow the spread of Covid-19 by wearing face coverings, it has created a new challenge for those who rely or can benefit from lip reading.
Mastering the new normal of communication with a face covering, while social distancing six feet away is difficult for anyone, especially those of the community we serve. This combination can disrupt the visual and auditory input people who are reliant on lip reading need to communicate effectively.
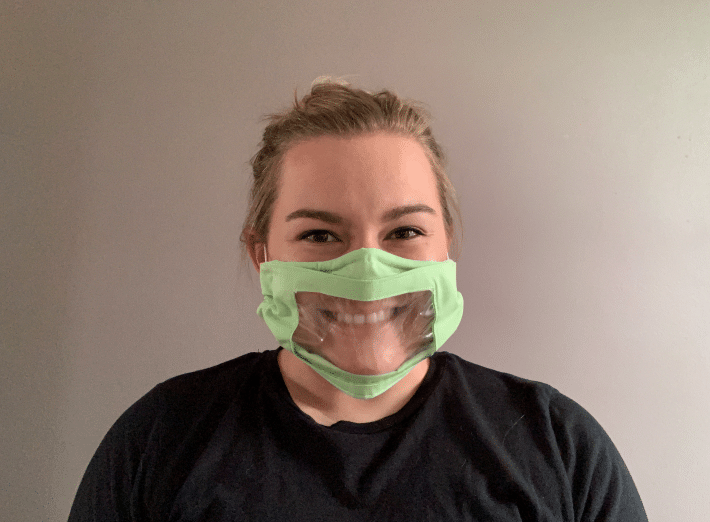
Smile Masks can help with that since the clear window design assists with communication access!
As a part of our commitment to meet the needs of the community we serve, smile masks can help overcome the communication barriers brought on by standard masks.
Standard face masks make lipreading impossible, but smile masks can provide a great alternative.
Smile masks are good for:
- Those reliant on lipreading
- Speech pathologist who need their patients to read their lips as a form of education
- Those who use American Sign Language as it leans heavily on facial cues and expressions
Make your own Smile Mask by following the instructions below!
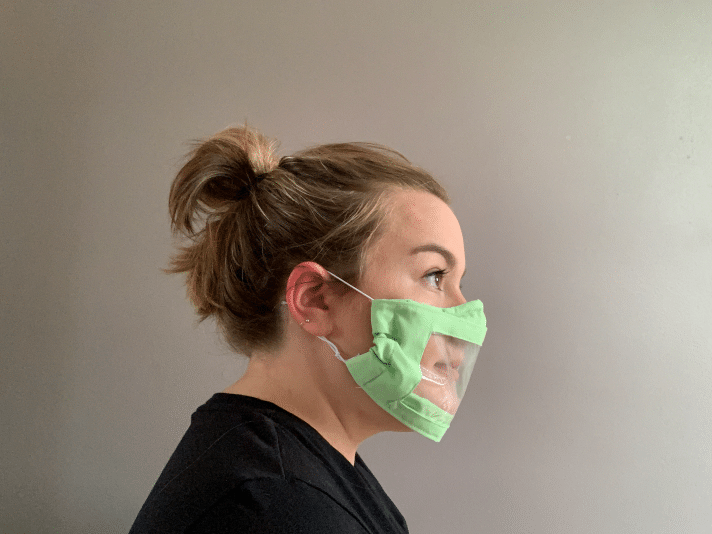
Instructions for Smile Mask
Things you’ll need:
- Two pieces of fabric 8.5” wide X 11” long —the size of a piece of standard printer paper
- One Pipe cleaner (can also use a paperclip, bobby-pin or something that bends easily to keep the mask secure on your face)
- One piece of plastic 4.5” wide X 6” long — utility plastic “fabric” or a binder paper sleeve. Something that is thin enough so you can sew through it easier
- Two pieces of elastic cord measuring 12” long —can use something like yarn or ribbon
- Pins to help with keeping fabric together while sewing—safety pins work well as an alternative
- Cut two pieces of fabric 8.5 inches wide by 11 inches long. These will be the exterior and lining pieces of your mask. Pin fabric right sides together on all four corners.
- Trace out a rectangle 2 inches wide by 4 inches long in the middle of your fabric. this will be the rectangle that you cut out for the window of the mask. Next, place four marks a 1/2 inch outside of the smaller rectangle, one in each corner.
- Cut out rectangle of both pieces of fabric.

- Cut slits starting at the corner of the smaller rectangle to the corner of the outer rectangle. Do this for all four corners.

- On one of the pieces of fabric, fold each side of the smaller rectangle to where the slits stop on the outside of the outer rectangle. Press down hard on the fabric so that it holds the crease from your fold. You can also iron these folds down if you want, but this is not necessary to keep the fold. Repeat on the other piece of fabric. NOTE: I’ve pinned each flap down so it’s easier to demonstrate where to fold. You can pin down the flaps if you would like, but this is not necessary.

6. Sew the outer edges of the fabric together using 3/8” seam allowance.
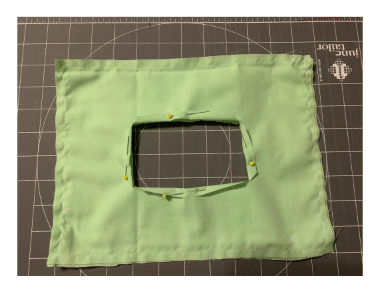
- Turn the fabric inside out. Take a pencil or a capped pen and push out all of the corners of the fabric so the edges look crisp and straight. This will make it easier to complete the top stitching for the next step.
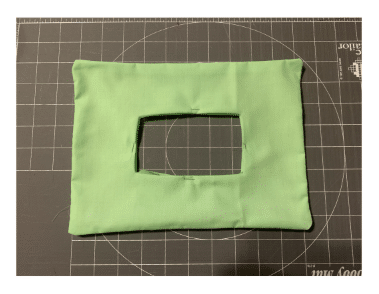
- Cut a pipe cleaner to the length of the fabric. NOTE: you can also use a paperclip, bobby-pin, etc. for this step if you do not have a pipe cleaner. This will be used for the top of your mask to keep it in place. Place the pipe cleaner/paperclip in-between both pieces of fabric. hold in place as close to the top of the seam as possible with pins. Top stitch the pipe cleaner against the edge of the top length of fabric. The stitching will encase the pipe cleaner. Continue top stitching on the other three sides of your fabric, making sure to stitch as close to the seam as possible. Top stitching helps give the mask some reinforcement and sturdiness so that it doesn’t fall apart.
Learn about what a top stitch is here.


- Insert your plastic piece between the two pieces of fabric and align with the window you cut out from step 3. The folds that you made in step 5 should now be on the inside of the mask. Pin the plastic to the edges of the fabric.

- Stitch together the plastic and fabric pieces as close to the edge of the cut out rectangle as
possible. This will help secure the plastic in place to make sure that there aren’t any holes
in your mask.

- Take the long parts of your mask and fold them together to meet in the middle of the plastic
window. Pin these down and top stitch as close to the outer edge of that fold as possible.
This should give you three panels total of your mask (top, bottom and middle sections).

- Fold top and bottom panels from the middle out to the edge of the top stitch you just completed and pin down.

- Working your way around the edges of your mask, fold the two short edges of the mask inward toward the plastic window and pin down. This fold should only go in about 1/2 inch. You can use the pins that held the panels to the mask from step 12 to complete this step.
NOTE: this will become a pocket for your elastic ear pieces.

- Sew down the fold at the edge of the fold closest to the window of your mask. This stitch should be like a top stitch in that you get as close as possible to the edge of the fabric.
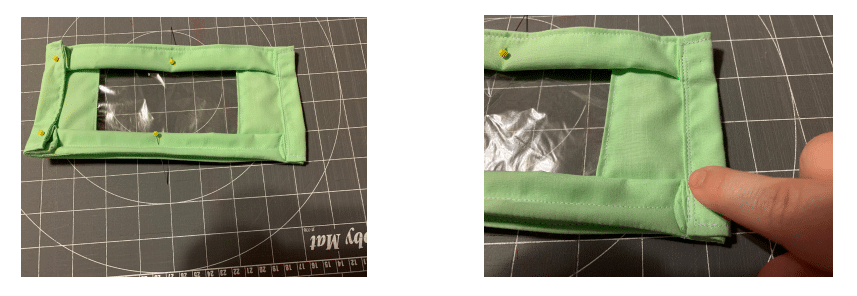
- Feed your elastic cord through these pockets. You may want to use a paperclip or safety pin to make it easier to feed it through.
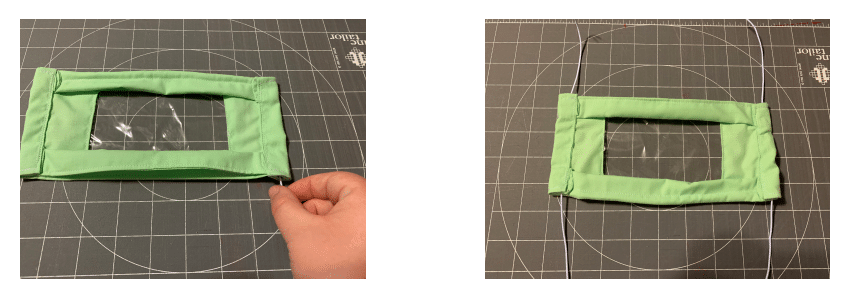
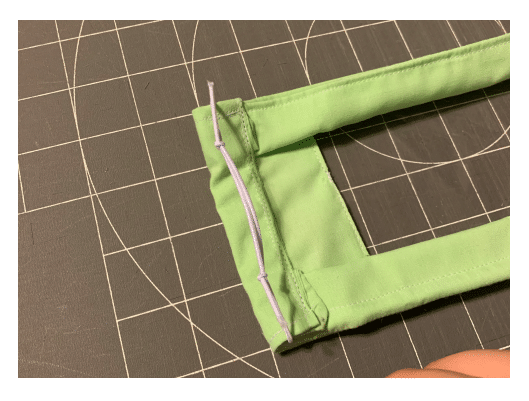
- Tie two adjustable sliding knots on each piece of the elastic to make your ear pieces adjustable. Learn how to tie this knot here.
Enjoy your new mask!!
Want to receive more content like this? Join our monthly mailing list! Subscribe here.